I've got so much to share with you this week, including the washi crafts I created for the newspaper feature, and I finally get to reveal my Pottery Barn Mystery Box Challenge! But today I'm excited to show you a corner of our garage that got a much needed butt-kicking in the organization department.
In your house, the garage may be the Mister's domain. But as a DIY home blogger, I contribute at least half the junk that clutters up our garage. It was such a gradual process of adding tools, paint, and materials, that I hadn't realized just how chaotic the space had become. I almost dreaded the start of each new project, because I could never find everything I needed. Organizing the garage seemed so overwhelming, that I just kept putting it off.
A few weeks ago, I finally ripped off the band-aid and went to it! So quickly, in fact, that I forgot to take 'Before' shots. But I'm sure you can all imagine a garage with over-flowing shelves and piles. We have shelves built around the top of the perimeter, but I needed to store things within my
I wanted to get these galvanized shelves, but they were out-of-stock, and when the organizing bug strikes, you have to move fast! So we grabbed the Gorm unit instead, and I'm really happy with the quality and sturdiness. Not to mention, super easy to assemble and add extra shelves.

Next, I rounded-up all
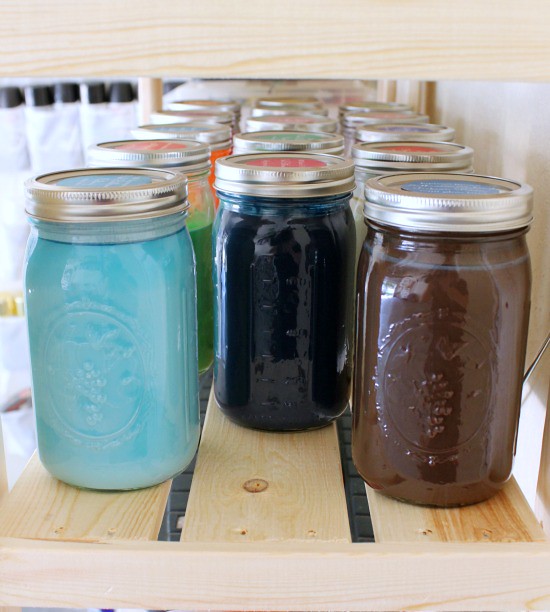
So I followed Jen's lead, and transferred them all to pint and quart-sized mason jars with airtight lids. Then labeled each (using this easy method) with the color name, location in the house it's used, finish, and type of paint.
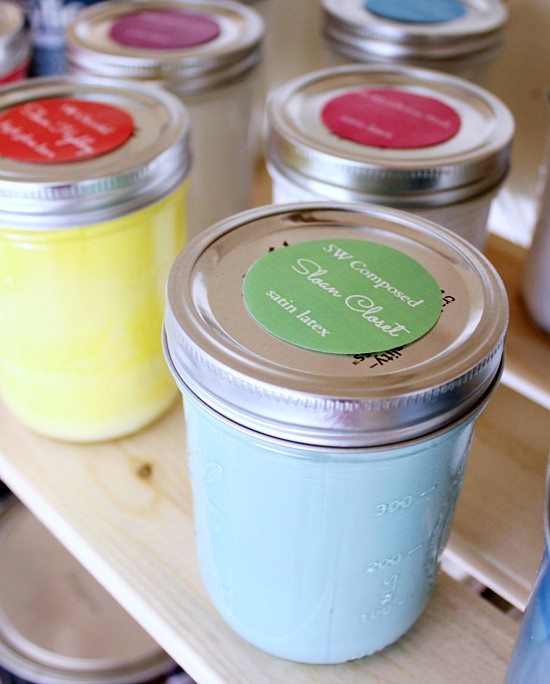
Many of my projects are small, or just touch-ups, so I went with wide-mouth jars so a brush would easily fit. This keeps me from having to pour the paint into a separate container, and the jars are easy to hold and shake.

Not only do the pretty rows of paint make me happy, but just like the newly Organized Spraypaint, it's easy to see what colors I already have on hand.
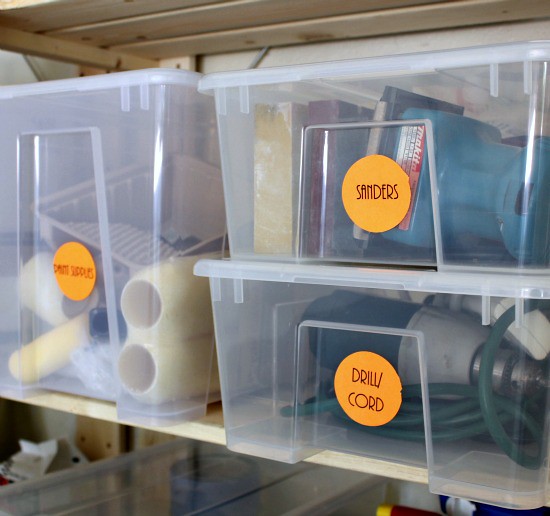
Once the paint was consolidated, I went after the rest of the garage crappola. I sorted everything into piles by category, then organized them in sturdy plastic bins. With labels of course.
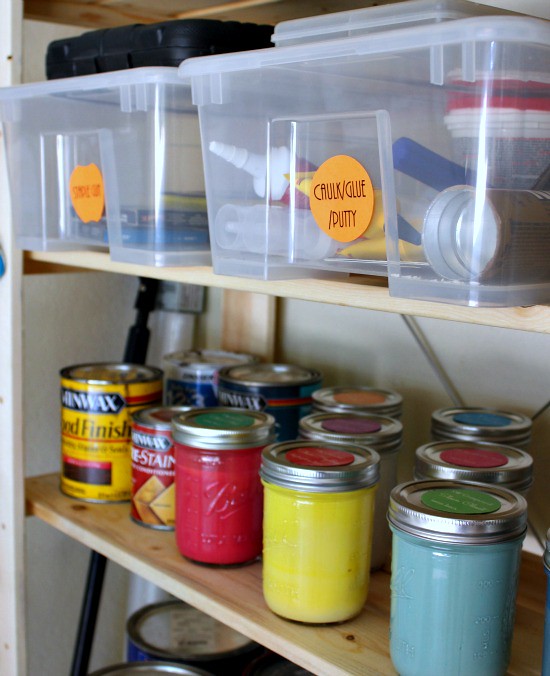
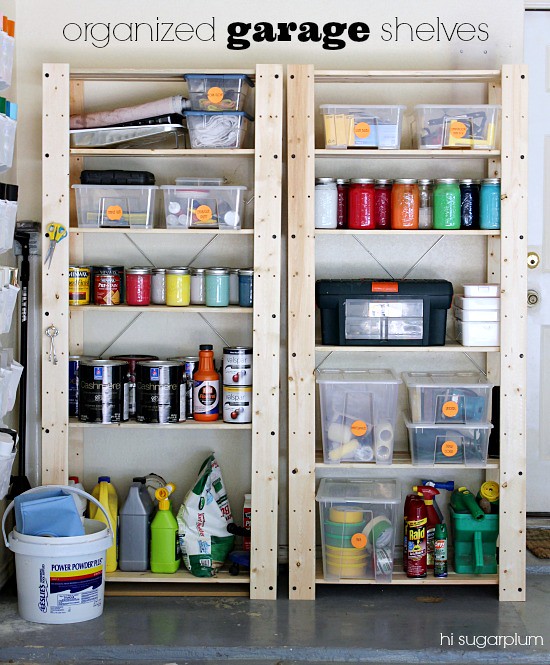
I like to see details, so I'll show you the contents of each shelf.
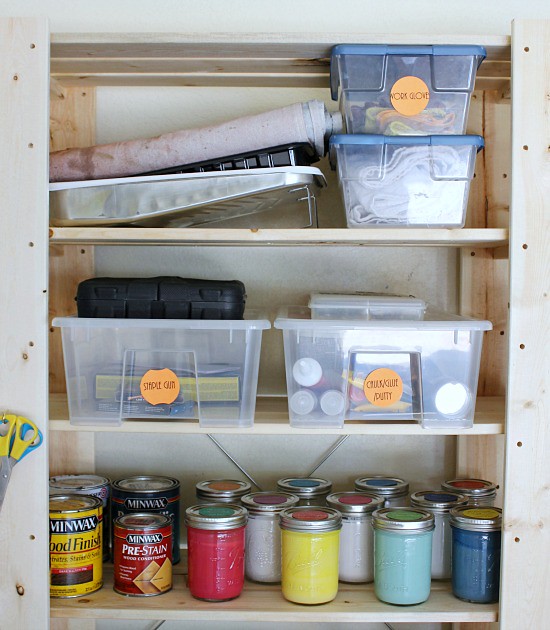
Paint trays and Dropcloths | Work Gloves | Rags
Staple Gun & Staples | Caulk, Glues & Putty, along with putty knives and spatulas
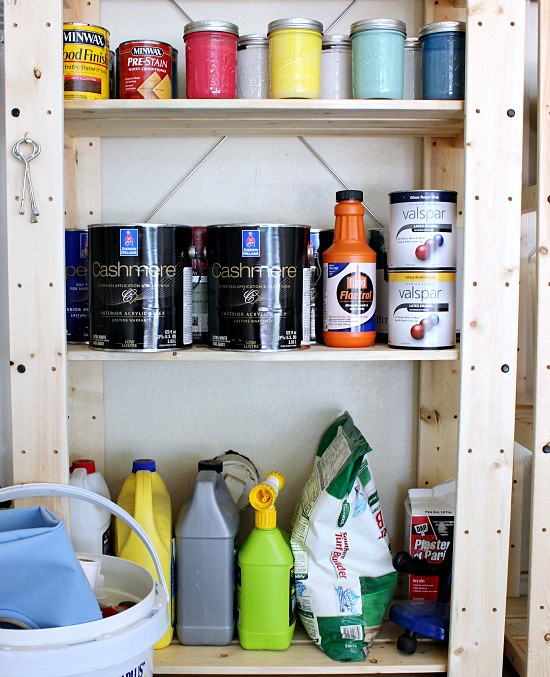
Stains & Wood Conditioner | Pint Jars of Paint from smaller projects
Full Gallons of Paint | Paint Conditioner
Car Fluids | Lawn Sprays & Seed | Random items like Plaster of Paris and drain thingie
The bucket holds all the car wash gear
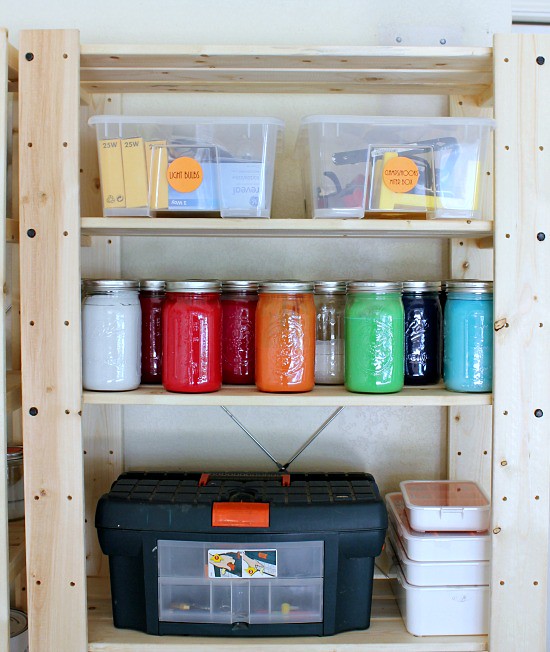
Light Bulbs | Miter Box, Hooks & Clamps
Quart jars of paint from rooms and larger projects
Toolbox with Mr. Sugarplum's randomness | Nails, Screws, Anchors, etc
Paint Supplies | Sander, Sanding Blocks & Paper | Drill, Bits & Extension Cord
Painter, Packing & Duck Tapes | Bug Sprays | More lawn crap

The cool thing about this system, is each bin has everything you need for that purpose. No more looking for a drill bit in the bottom of the paint pan! The extra shelves also allowed me to store more things outside (like light bulbs and tape), which freed up room in my utility room cabinets. It never ceases to amaze me how organizing can actually create more space!
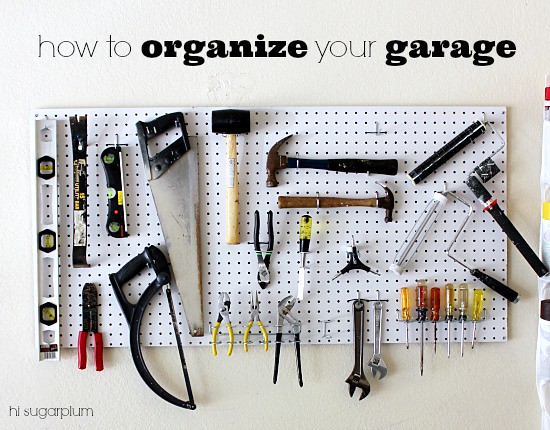
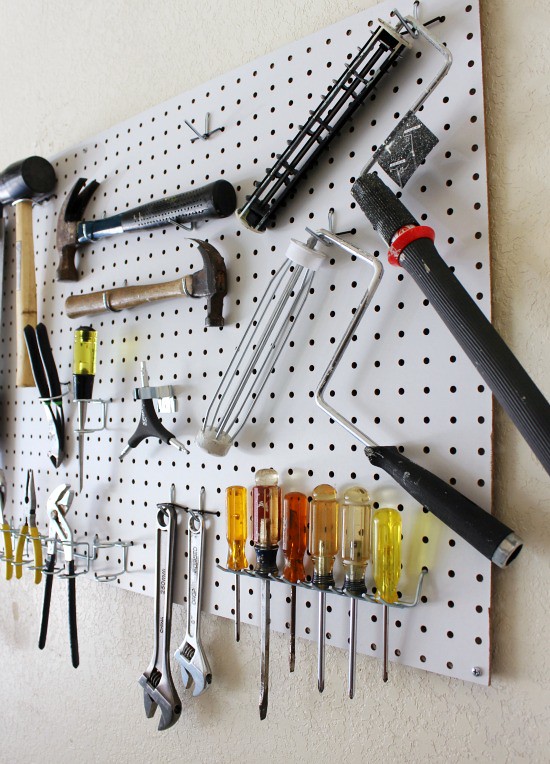
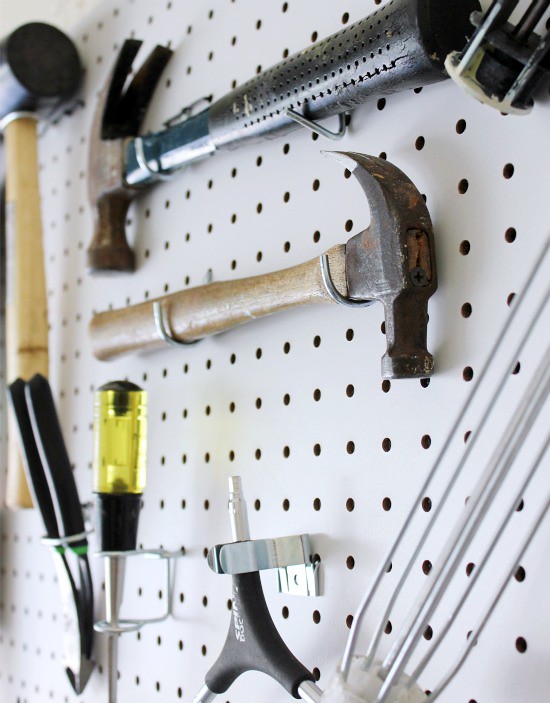
Finally, we had all the tools to deal with. We could have put them in a toolbox, but not all would fit, and you'd still have to dig around. I wanted to be able to see everything, and have it at my fingertips....so an off-the-shelf 2' x 4' piece of pegboard from the hardware store got 'er done!
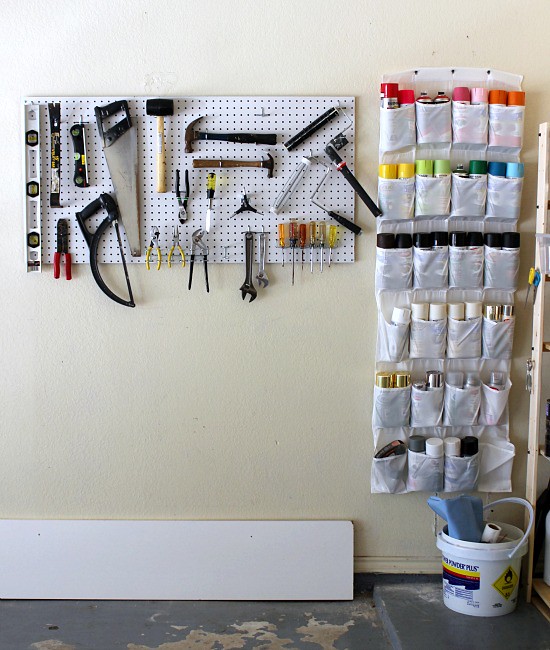
These pegboard hooks
How about this little corner of organized bliss?!?!

The shelves are un-treated wood, but I was too impatient to paint or stain them first. I figure since they're enclosed in the garage, they'd be fine. We did use L-brackets to brace them to the wall, though. Next up is organizing the lawn tools and the overwhelming pile of sports equipment!
What's the condition of your garage these days?! Is your sandpaper mingling with the grass seed?
0 comments:
Post a Comment