When we created Babygirl's Room, she was still very young without a lot of opinions of her own, and was mostly just excited to have her nursery turned into a big girl room. She was really into Fancy Nancy books at the time, so we kept her room mostly theme-free, but added touches of Paris here and there. Now she's an opinionated 2nd grader, with very specific interests and ideas of how she wants her room to look and feel.
And as she informed me awhile ago, "Mommy! I'm not into Paris, I'm into horses!" Well, I'm not into recreating a room every time she has a whim, so I just nodded and gave her a horse book.
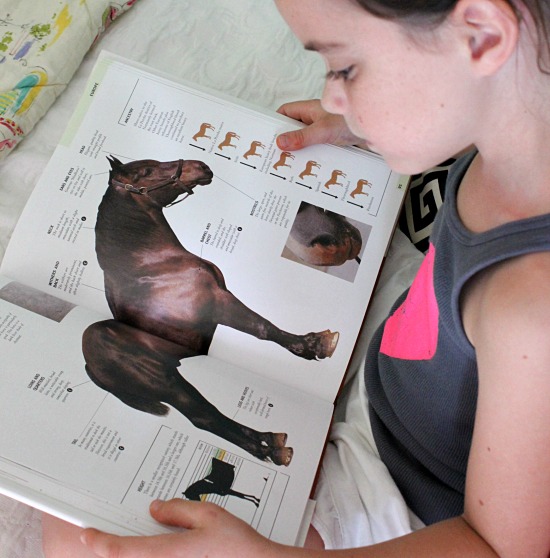
But now a full year has passed, and her equestrian obsession is still in a full gallop. There is no harnessing her love of horses. (I could go all day, people.) And while I think kid's rooms deserve to be decorated with the same level of style and taste as the rest of the house, I still want it to reflect who she is, and more importantly, be a space she loves. But let's be real, she's likely to trot away from horses someday, so we don't want to invest a lot of hay. (Too much?)
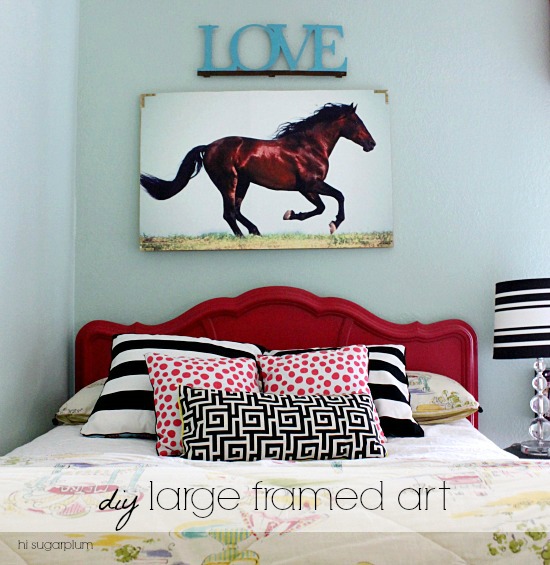
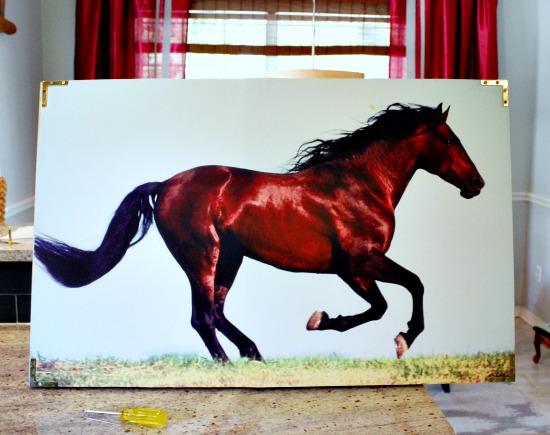
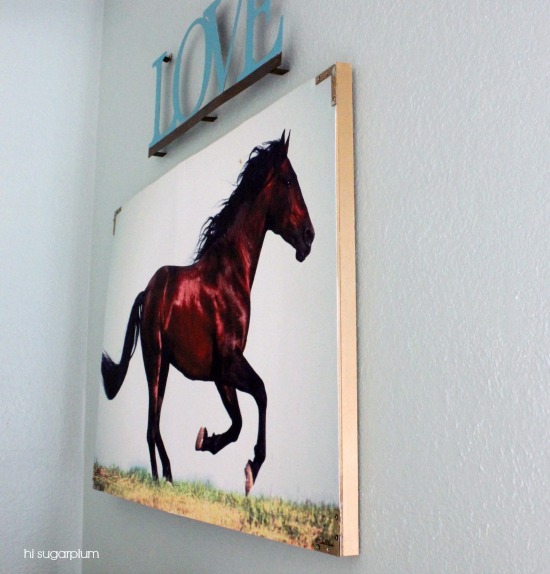
Her bed is a focal point in the room, so I knew that was a great place to saddle up. (Okay, I'll stop, I'm even annoying myself.) But horse art isn't exactly easy to come by...and the ones we loved (like these and these), were crazy expensive. So of course we made our own! After countless Google image searches, she found exactly the horse she wanted, and we uploaded the image to Staples Copy Center and had a 2-foot x 3-foot poster printed. (Tip: thanks to a coupon, ours was $15.)
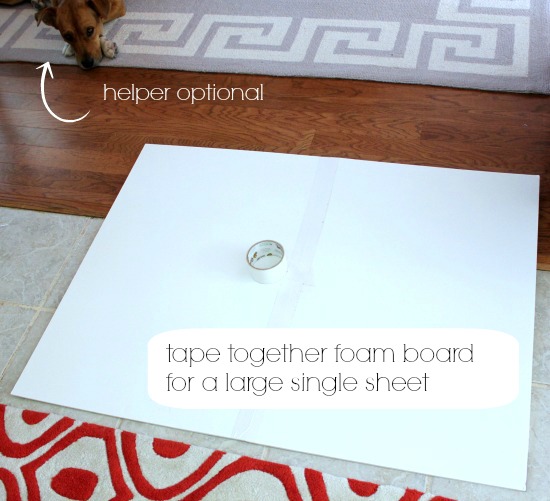
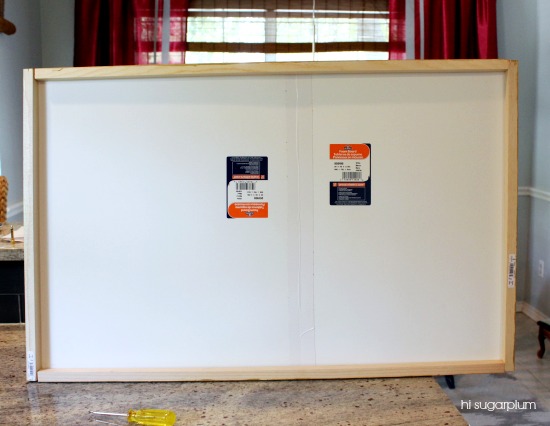
First part of the project is to create a sturdy backing for the poster.
1) Since the poster is so large, use Duck tape to connect two pieces of foam board (kind of like the Cornice in Babygirl's Room).
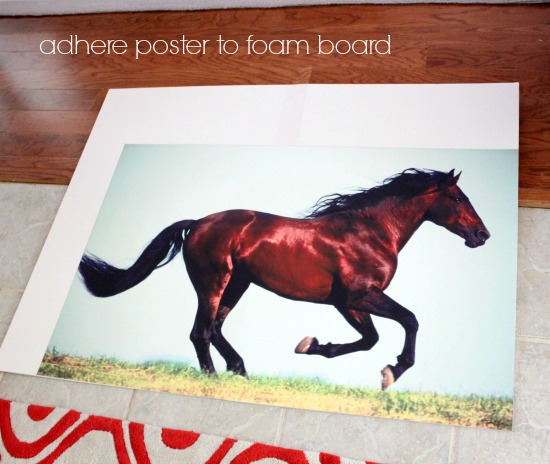
2) Glue the poster to the foam board with spray adhesive.
3) Trim the poster using a ruler and sharp exact-o knife.

Now you've got a solid little poster that you can mount to your wall with Command strips. But we wanted to give it a little flash and more substance, so the next phase is to build the frame. Don't fret, no power tools needed. If you can manage a screwdriver, then you're golden.
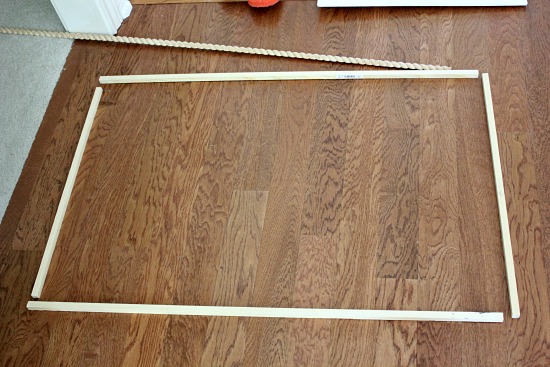
4) We used inexpensive 1-inch square dowels (found in the trim aisle at Home Depot), and cut the side pieces to 24-inches, and the top and bottom pieces to 34-inches.
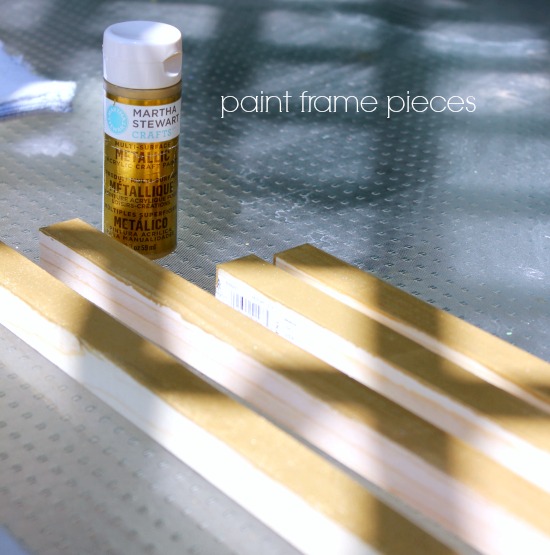
5) Paint the trim, and the edge of the foam board...I used Martha Stewart Gold because it has a nice reflective finish.
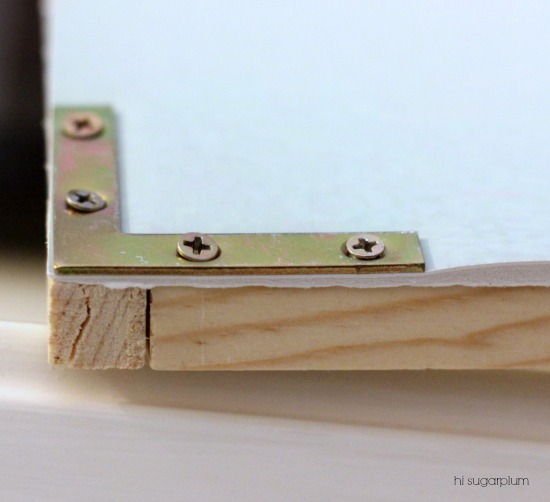
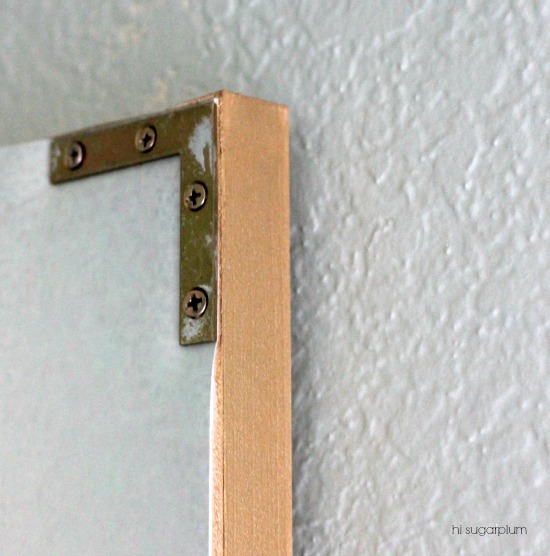
6) Assemble the frame pieces, with poster on top, and screw a flat bracket into each corner to hold them all together. Make sure your screws aren't longer than your frame.
 |
Here's how it looks from the back. And because we used foam board and dowels, it's light as a feather, so it hangs easily with just a nail or two.
We couldn't be any happier with how it looks! And I know some of you are worried about copyrights, but it's for our personal use, and not for sale. We even fiddled with it a little in PicMonkey before printing. Besides, if Jenny says it's okay, it must be.
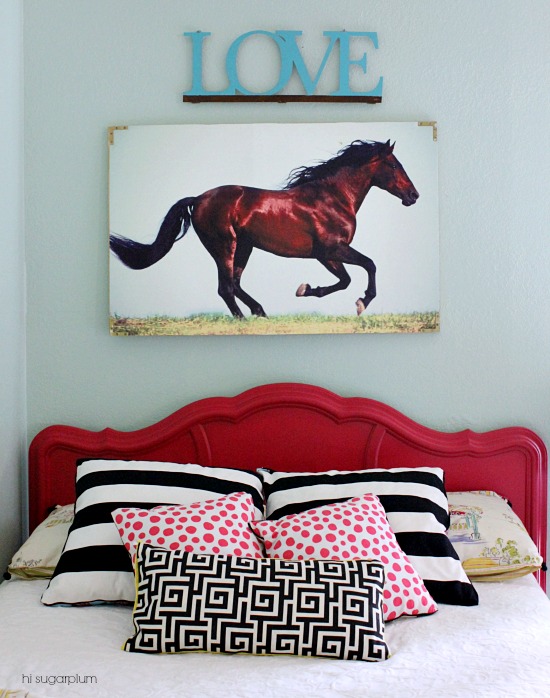
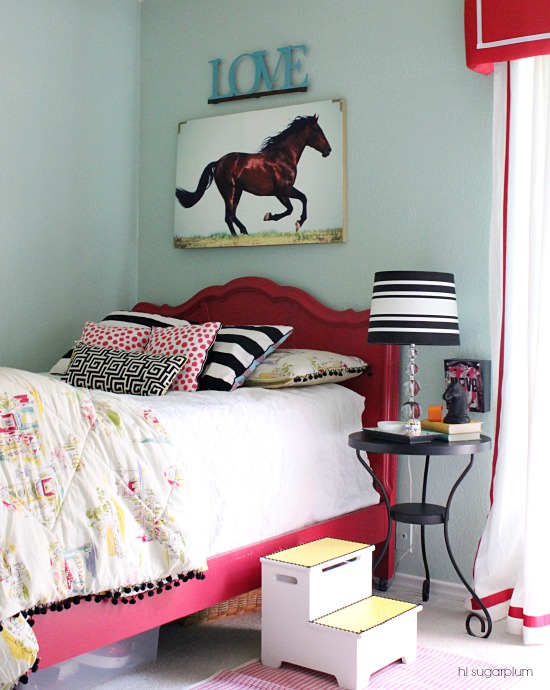
Just the simple act of removing the Paris prints, and hanging the horse art, has given her room a new feel. We're still smitten with the original color scheme, so all we have to do is switch up the accessories to accompany her new tastes and interests.
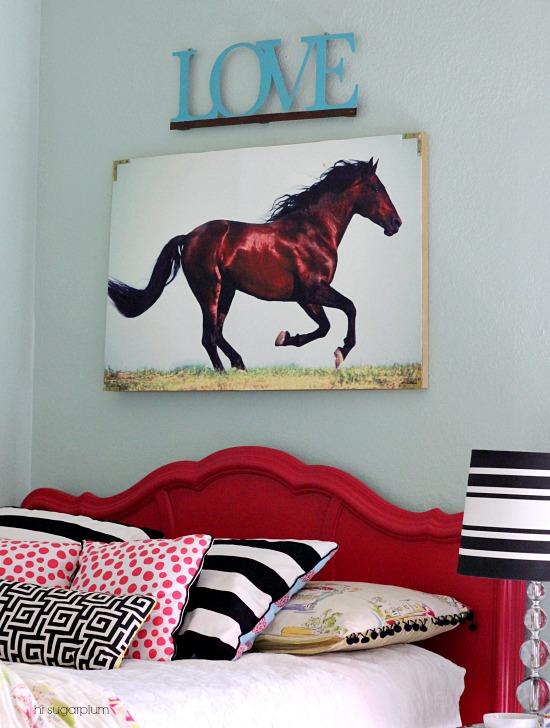
Adding the frame wasn't necessary, but is a great finishing touch.
I thought about Rub 'n' Buffing the brass corners, but decided they looked more authentic this way.
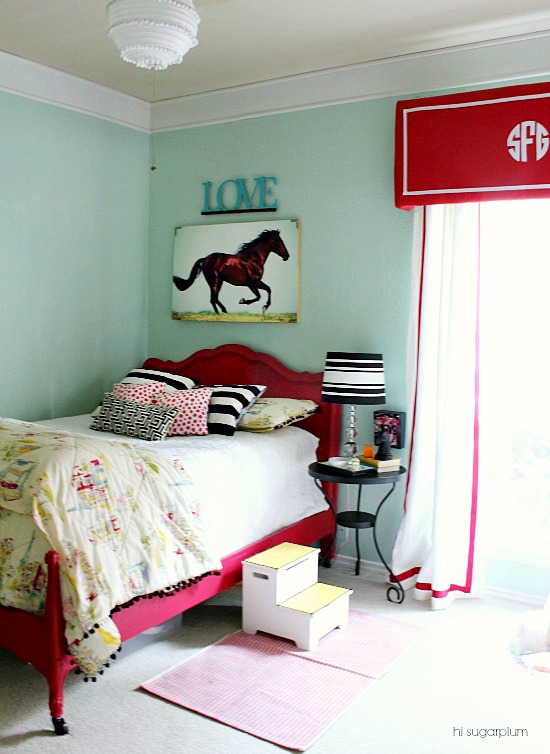
A horse head from the Target Dollar Spot took the place of the Eiffel Tower on her nightstand, and she keeps her larger horse toys on top of the Highboy.

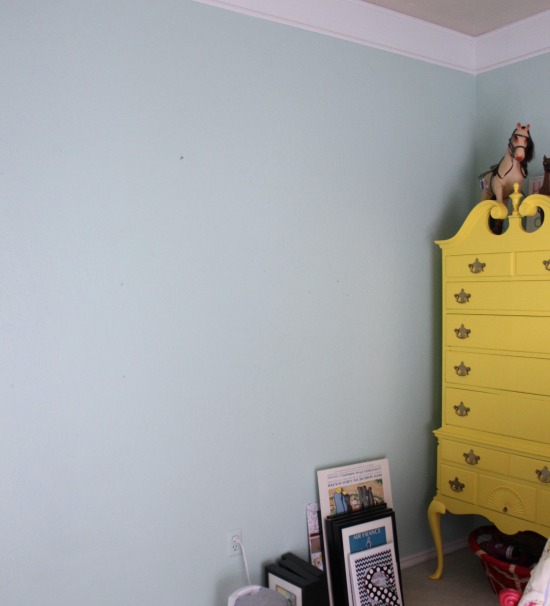
The Gallery Wall was very Parisian, so it came down, too. We haven't decided what we'll put on this large wall yet.
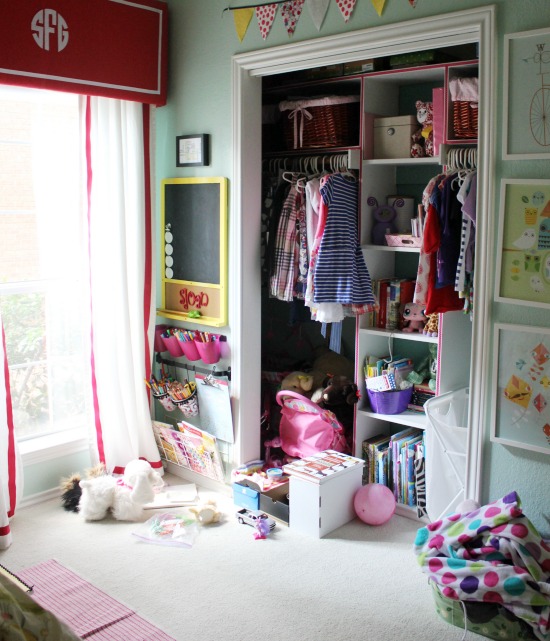
And lest you think we aren't human, here's a shot of the other side of her room. Real life happens behind the blog pictures. But I'm not going to lie, looking at it makes me twitch.
But my little Seabiscuit is a happy
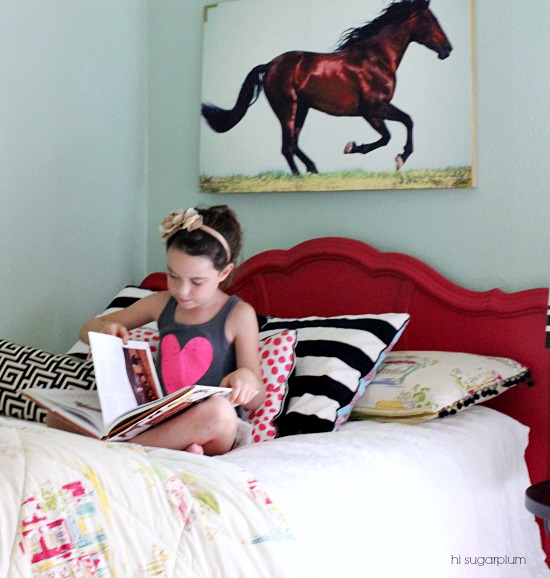
I'm so excited about how this project turned out! You could print and frame virtually any custom size art you wanted, with very little expense. Have you ever printed large images at a copy center? The engineering prints look cool, but they aren't recommended for photo images.
Read more about the projects in this room:
Full Reveal | Yellow Highboy | Radish Bed | No-Sew Pillows | Corner Art Center | Monogrammed Window Pelmet | Faux Crown Molding | Painting the Ceiling | Pom Pom Light Fixture
Haagen-Dazs has chosen me as DIY brand influencer for their "Moments for Me" campaign, which encourages us to create spaces that allow us to recharge and have special moments. Share the moments you cherish in your everyday life using hashtag #HDMoment, and Haagen Dazs might share it over on their tumblr page. I'm so excited to be part of something so positive!
This is not a sponsored post.
0 comments:
Post a Comment